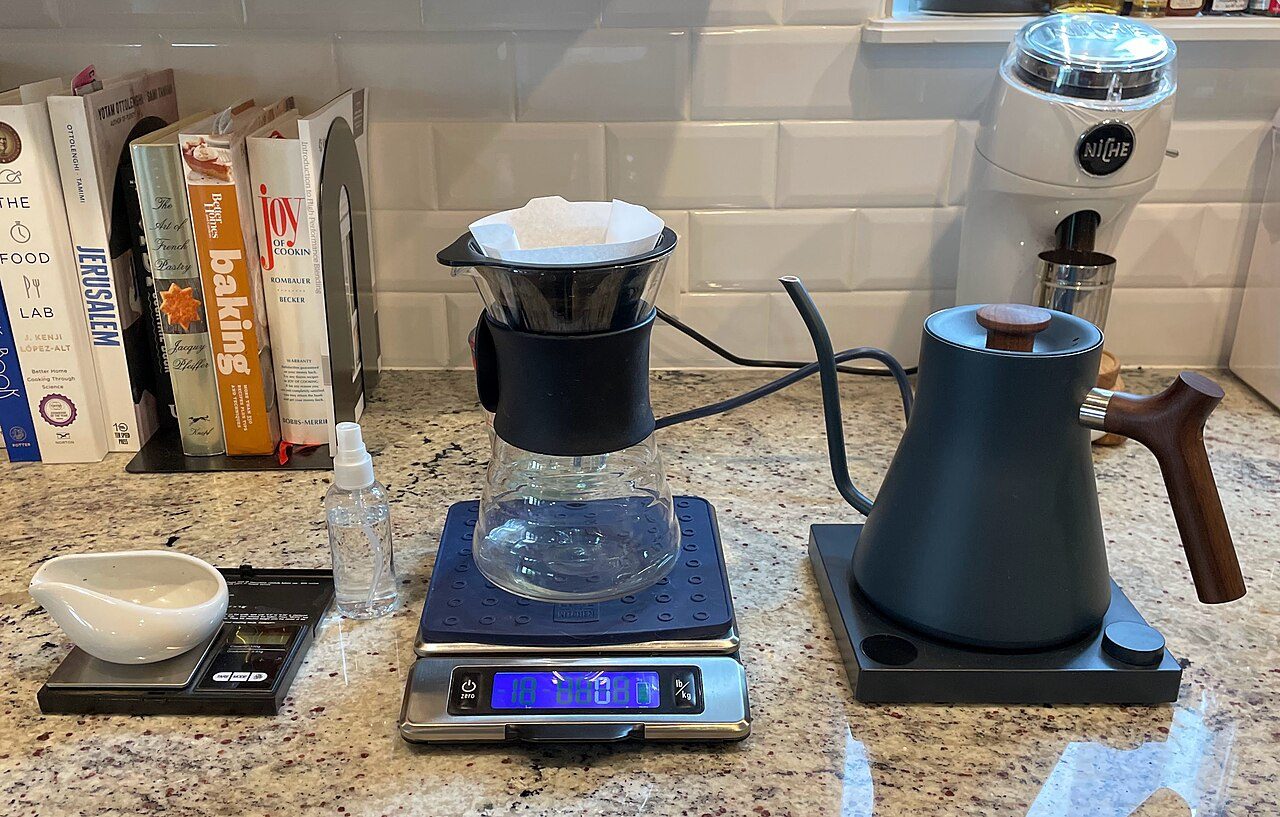
Pour-over is the clearest way to taste a coffee. Nothing is pressurised, nothing is trapped, and the water passes through the bed once and leaves. That honesty is also the hard part: every variable you get wrong shows up in the cup. The recipe below is the one we brew on the roastery bar, written out in full so you can repeat it at home without guessing.
What you need
- A cone brewer and paper filters — a V60, a Kalita Wave or anything with a similar shape.
- A scale that reads to one gram, and a timer.
- A burr grinder. This matters more than the brewer does.
- A kettle you can pour slowly from, ideally with a gooseneck spout.
- Fresh coffee, roasted within the last month and ground in the last minute.
The ratios
Work in grams, not scoops. A brew ratio is simply coffee weight against water weight, and sixty grams of coffee per litre of water — a 1:16.7 ratio — is the middle of the road we start every new coffee from.
- One cup: 15 g coffee, 250 g water.
- Two cups: 22 g coffee, 370 g water.
- Carafe: 36 g coffee, 600 g water.
- Water temperature: 94 °C for a light roast, 90 °C for a dark one.
- Total brew time: two and a half to three minutes for a single cup.
Step by step
- Rinse the filter. Put the paper in the cone and pour hot water through it until it is soaked. This rinses away the papery taste and warms the brewer and the server, so your brew water does not lose five degrees on contact.
- Weigh and grind. Grind at a medium setting, about the texture of coarse sea salt. Tip the grounds in and tap the cone flat so the bed is level.
- Bloom. Start the timer and pour twice the coffee weight in water — 30 g of water for 15 g of coffee — over the whole bed. It will swell and smell of baking. Wait until 0:45. This releases the carbon dioxide that would otherwise push water away from the grounds.
- First pour. From 0:45 to 1:15, pour in slow concentric circles out to the edge of the bed and back to the middle until the scale reads 150 g. Never pour directly onto the paper.
- Second pour. At 1:30, top up to 250 g with the same circles. The bed should stay flat and the water level should never reach the rim.
- Drawdown. Let it finish. The last water should pass through by 2:30 to 3:00, leaving a flat, even bed with no dry ring up the sides.
- Swirl and taste. Swirl the server to mix the brew, pour it, and taste it as it cools. Coffee changes character between hot and warm, and most of the clarity arrives on the way down.
Reading the cup
There are only two faults worth learning to recognise. A brew that tastes sharp, thin and salty is under-extracted: the water left before it had taken enough. A brew that tastes dry, hollow and bitter is over-extracted: the water took too much. Change one thing at a time, and change grind size first.
- Sour and thin, drawdown under two minutes? Grind finer.
- Bitter and drying, drawdown over three and a half minutes? Grind coarser.
- Flat but not obviously faulty? Raise the water temperature by two degrees.
- Muddy or silty? Stop stirring the bed mid-pour, and stop grinding so fine that the fines choke the filter.
Practical tips
- Filtered water makes a bigger difference than a better brewer. Very hard water mutes acidity; distilled water makes coffee taste empty.
- Let a bag rest three to five days after roasting before you brew it. Degassing coffee is unpredictable.
- Keep one variable fixed while you learn: same dose, same water, same brewer. Move the grinder only.
- Write your recipe on the bag. You will not remember it next Saturday.
Where to go next
Grind size is the lever you will reach for most often, so it is worth understanding properly — start with our guide to choosing the right grind size. If you are brewing under pressure rather than through a paper filter, dialling in espresso by dose, yield and time covers the same thinking with a stopwatch attached.
